@DaveK
Haha, 14 days ago someone showed his (very cool pumpkin btw.) first test with new render features, now he wants transparency.
It must be tough for a programmer.
Like having one piece of meet (his life) for a quickly growing pack of baby wolves - just wanting more, more, more.
@DaveK
Haha, 14 days ago someone showed his (very cool pumpkin btw.) first test with new render features, now he wants transparency.
It must be tough for a programmer.
Like having one piece of meet (his life) for a quickly growing pack of baby wolves - just wanting more, more, more.
@SporkFuMaster
I tested a bit around for your wings material.
Interestingly, there seems to be a difference between a mesh filled with roughness 0 and metallnes 1 (chrome) first or vice versa.
Try to fill the wings with roughness 1 metallnes 0 first. So no reflections.
Now you can paint in reflection areas with chrome material, even with a bit of rainbow color variation and some illusion of more or less transparency.
I couldn’t achieve this vice versa, means an object filled with chrome first can’t be painted to roughness without reflection. No real solution, more a kind of workaround. The border between rough and not rough always looks a bit uncool. Maybe you know it better how to solve this?
Btw. If you don’t want me posting pics in your thread, just tell me and I’ll delete it.
No problem with any additional pictures. It’s all about learning more.
And the wings did have a metallic kind of sheen to them, but at that angle it didn’t really show up too well. I just tried to do a recorded turntable to kind of show it. Now to see if it uploads. Nope.
Next question. Where would I upload that to in order to show it here?
Tried setting up a YouTube channel (never thought I’d ever do that, I’m old…lol). Let’s see if this works.
@knacki I don’t think it’s better, just a different style. Where your sculpt would fit into an art gallery, mine doesn’t really have much of a place…lol.
And yeah, the wings were made out of two meshes. Well technically, the vein part to the wings is just a whole bunch of cylinders. Originally, I had no clue how I was going to make them, but it turned out to be a lot easier than I expected once I broke it down a bit. Though I should have smoothed out the intersections once I finished. The transparent portion was just a really thin box that I trimmed around the edges.
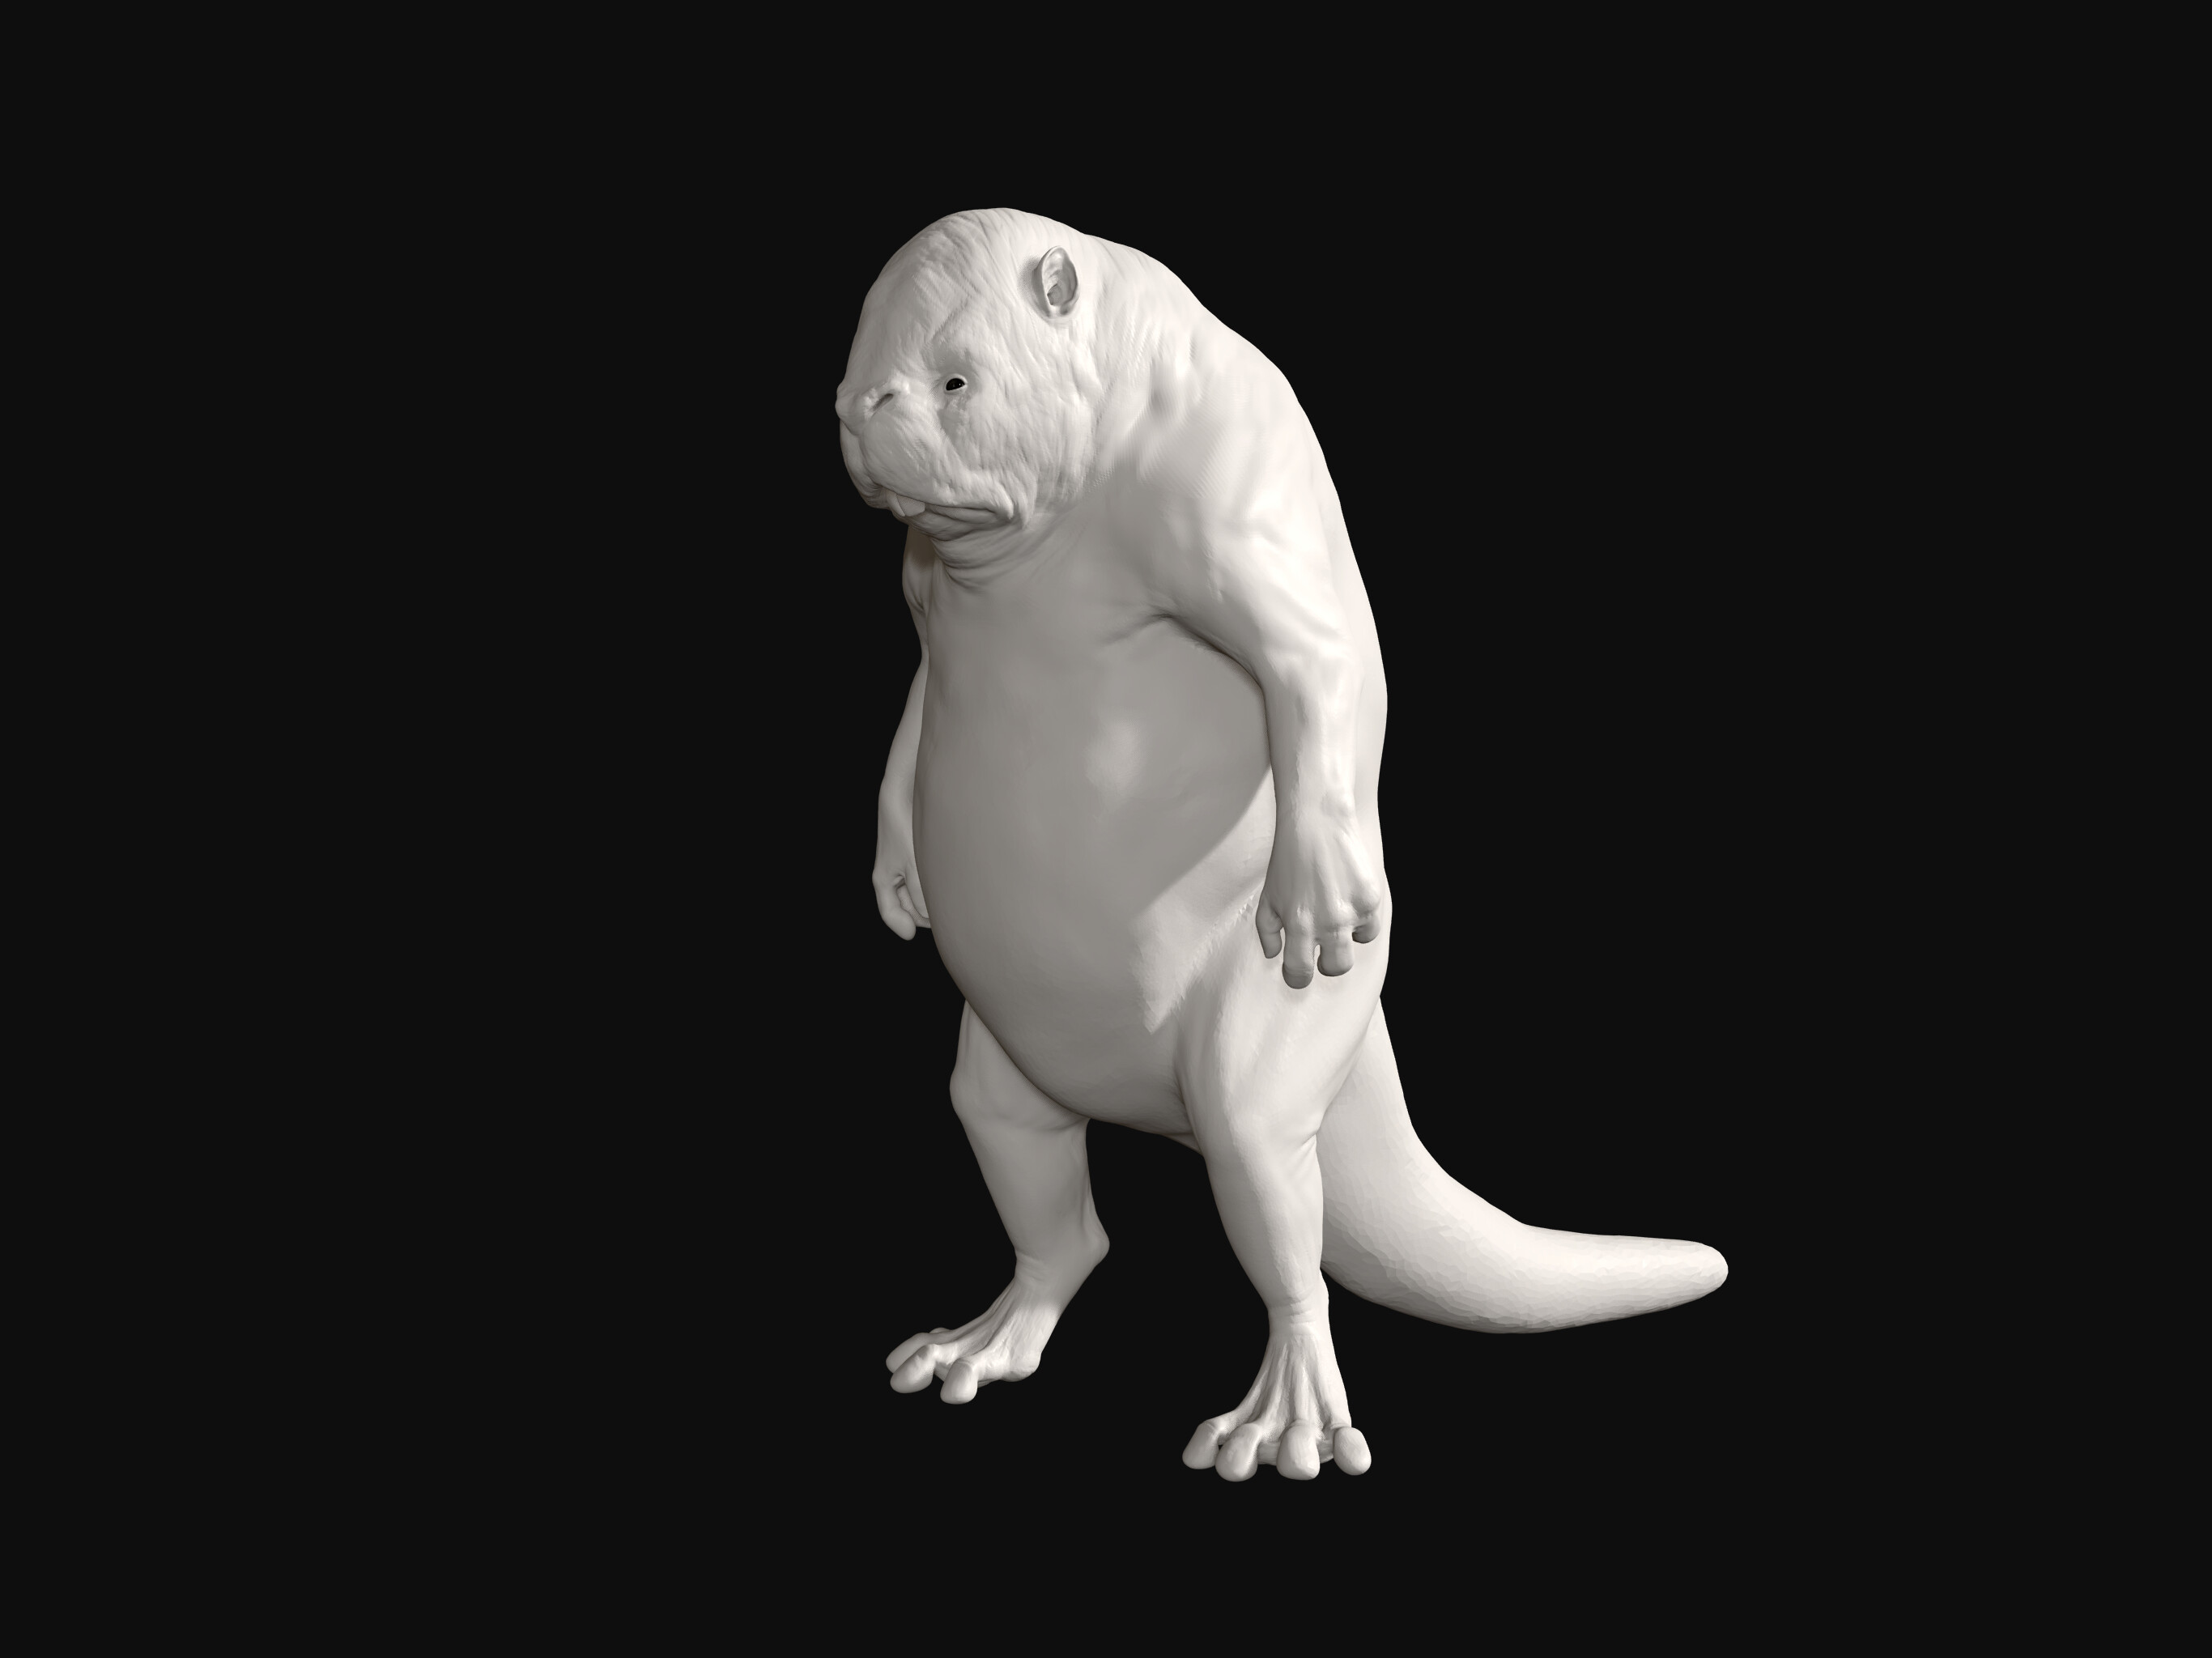
And something new for today. Started it yesterday as a kind of cartoony head. It turned into the Angler Rock-Backed Turtle. Usually hunting at night with a bioluminescent tipped tongue, this one is pulling in a bit of air and taking in the sights. Unfortunately, the reflection doesn’t show up once the opacity is anywhere below 100%.
I did the whole body since I wasn’t sure how much of it was going to be visible. Still kept a cartoony sort of look combined with some texture. Weird combination, but I kind of like it. Really could have used the height painting for this one.
I found a nice & quick way doing fairy veins with triplanar. Triplanar for insect wing veins
Took me a few minutes and one can use size pressure for small to big diameter.
Maybe you like this method as well?
@Drmabuse Thanks. And that is one area I do really enjoy procreate for. The line work that you can get so easily with procreate is amazing. You haven’t gotten him into Nomad yet?
@knacki Damn. That looks a lot easier than how I did it. I didn’t even think about that. Still haven’t used that triplanar option yet. Seems like a lot of things can be made with it.
Well, started with a head this morning. Didn’t feel like starting something new, so I gave him a body. Now that he’s evolved towards bipedalism and an opposable thumb, I’m going to attempt pushing him a bit further and try some kind of sci-fi outfit. Which is also why a lot of the body has so little detail since it likely won’t be seen. Can’t say I can pull it off, but it will be fun to try…lol.
I did try a couple other helmets. They were worse than this one. Though this one seems more like a flashy motorcycle helmet, it should be fine. Even if it reminds me of a koala…lol. Still more to add to it before I start moving on to other areas.
Almost finished with that suit. Still need a few things for the legs and it should be nearly there. So I figured I’d take a quick break from it and do a more fun little alien head tonight.
I’ve been meaning to see that movie. Just never made the time. I’ll have to see where it’s being streamed.
Couple more quick heads. Pulled the eye from the cyclops so I had something to stand in for the eyes and I never made a new one. I really need to make some more eyes to be able to make it a bit faster. On the other hand, I really should spend some more time on a head to get something a bit more finished…lol.
Hey Spork, these are great! Just wanted to quiz you on your eye geo, are they painted onto a glossy sphere or do they have a cornea outer shell? I bought this on Turbosquid… https://www.turbosquid.com/3d-models/eye-3d-model/1109920
… and not sure how to bring it in to nomad, would it be best to convert texture maps to poly paint in zbrush then export obj?
@Steve The eye was a combination of two spheres. They are really quick to and simple to make. You can make one in a few minutes.
Start with a sphere. Make a copy so it’s ready for later, but make it invisible for now.
Go into an orthographic view and turn it to the side. Use the trim brush to cut off just how big the iris is going to be (could be different if you’re creating an eye for a human or cat for example). That keeps a nice smooth cut without it remeshing the whole thing.
Now, you can pull the iris in slightly and start using dynamic topology to carve and sculpt in the little parts of the iris. This part goes a lot quicker than it sounds. The part that takes a bit more time is the painting. Here’s one more area where it would be helpful to have the height/cavity painting. But, it can still be done. Depends on how much time you put into it as to how realistic it looks. Usually I keep the paint with a roughness around half and zero metal.
Next is the lens. Make the other sphere visible again and lower the opacity a decent amount and zoom in a bit. Use the gizmo so it’s just a hair larger that the eyeball. Get the move brush to about the size of the iris and from the side just pull it out a bit. Now lower the opacity to a few percent. Decrease the roughness and increase the metal, and you now have an eye that should be almost the same as the one you bought. It’s not a perfect solution for a completely anatomically correct eye, but it works fairly well since you are rarely zoomed into the eye far enough to see any minor differences.
And I really wanted to test out some hair to see how Nomad would do. Could have probably gone with a lower resolution on each strand and it would have been just fine. Each strand was just a bit below 200 at the moment and I made about 2600 hairs. So with just ever half a million faces for the hair, I have a lot of memory left over if @Southerngfx had his iPad at 15 million with no problems. Just a quick test with no major grooming, but I think it does well enough for my needs if I spend a bit more time with it.
@SporkFuMaster thanks for the breakdown of the process, that’s a great help and great to know it can be achieved in nomad, hopefully when refraction feature is added to materials it will further enhance cornea effect