Hi Holger, this is interesting.
Is this similar to the method you used in your recent video (where you projected the shield graphic PNG and created geometry from it? (your tutorial vid)
The results are quite good here, looking a little thicker/volumous than the ref but still good. Would be a good file just to be able practice to paint.
My photo ref was never pefectly ‘head-on’ (slightly leaning back, i took the photo standing in front of it, looking up at it) (12ft high) but this still looks pretty good to be honest.
I was playing with the tube tool last night, trying to create decent swirls but i must admit i was failing to create perfect curves.
Sketchup for example that Im used to, has 2D tools for creating lines, you can create perfect arcs in a sequence, pair them to each other to create a swirl.
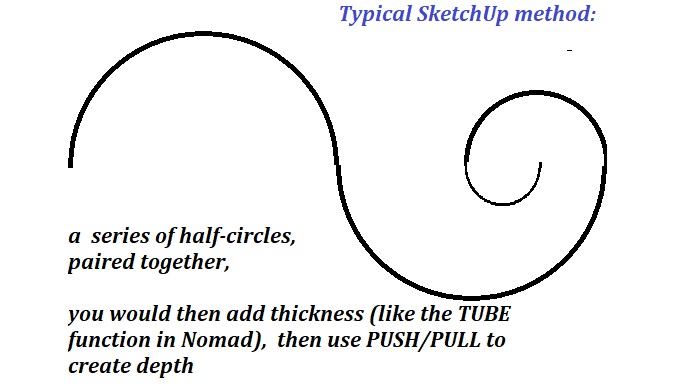
In Nomad, here;s what I did to try and achieve the same:
- Use tube to click point ot point , create a ‘general/rough’ quarter circle / half circle line.
- validate
- rotate around it a bit, use Gizmo to stretch into the Z axis.
Teh result was basically a ‘squashed’ / flattened type shape, not ideal.
So then i thought, ok, if i pan round to LEFT view, i can use trim to cut the back and front areas of the tubing to create a flate plane across both.
This looked… ok but was a bit involved to be honest.
The geometry looked marred/imperfect after the TRIM process (had flaky edges here and there).
- i went back a few steps and upped the geometry detail (voxel increase), in the hope the end result may look better, but even at 300 detail, the mesh still looked a bit messy.
I’m used to using measurements to create objects to an extent.
I will try with the method @Josepmy suggested, but my method was quite flawed really.
- the circles are still imperfect using my tube method.
I guess this comes down to the fact that nomad doesn’t have native 2D tools (and i guess… why would it?) but it would be great to know if I can achieve what I’m trying to do.
I come from Sketchup where I was making buildings…:
www.sketchfab.com/skillipevolver
But I got tired of SU and found the portability of the iPad very appealing for modeling.
Also, my SU license expired, and I found it less malleable for texturing. (another plus for Nomad).
I was inspired by Red Dead Redemption 2 and wanted to eventually model this:


